
In this article, we will explain how to install Intellij IDEA, create a Maven project and publish it on GitHub.
Note that to publish a project on GitHub, you need to have an account. To create a Maven project, you need to have Java and Maven installed on your computer. You can find the links to our previous guidelines on the installation in the description under this video.
- Open Google and search for IntelliJ IDEA.
- Open the page with the Jetbrains distribution kit. You can find the link in the description.
- Click on the Download.
- As you can see, there are two versions of the software – a free Community version and a paid Ultimate version with a 30-day trial period. In most cases, a free version will be enough for writing tests in Java.
- Click the Download under the Community version. The downloading will start automatically. The file will be saved in the specified folder.

- Open the folder with the downloaded file and run it.
- Select the folder for installation and click on the Next.
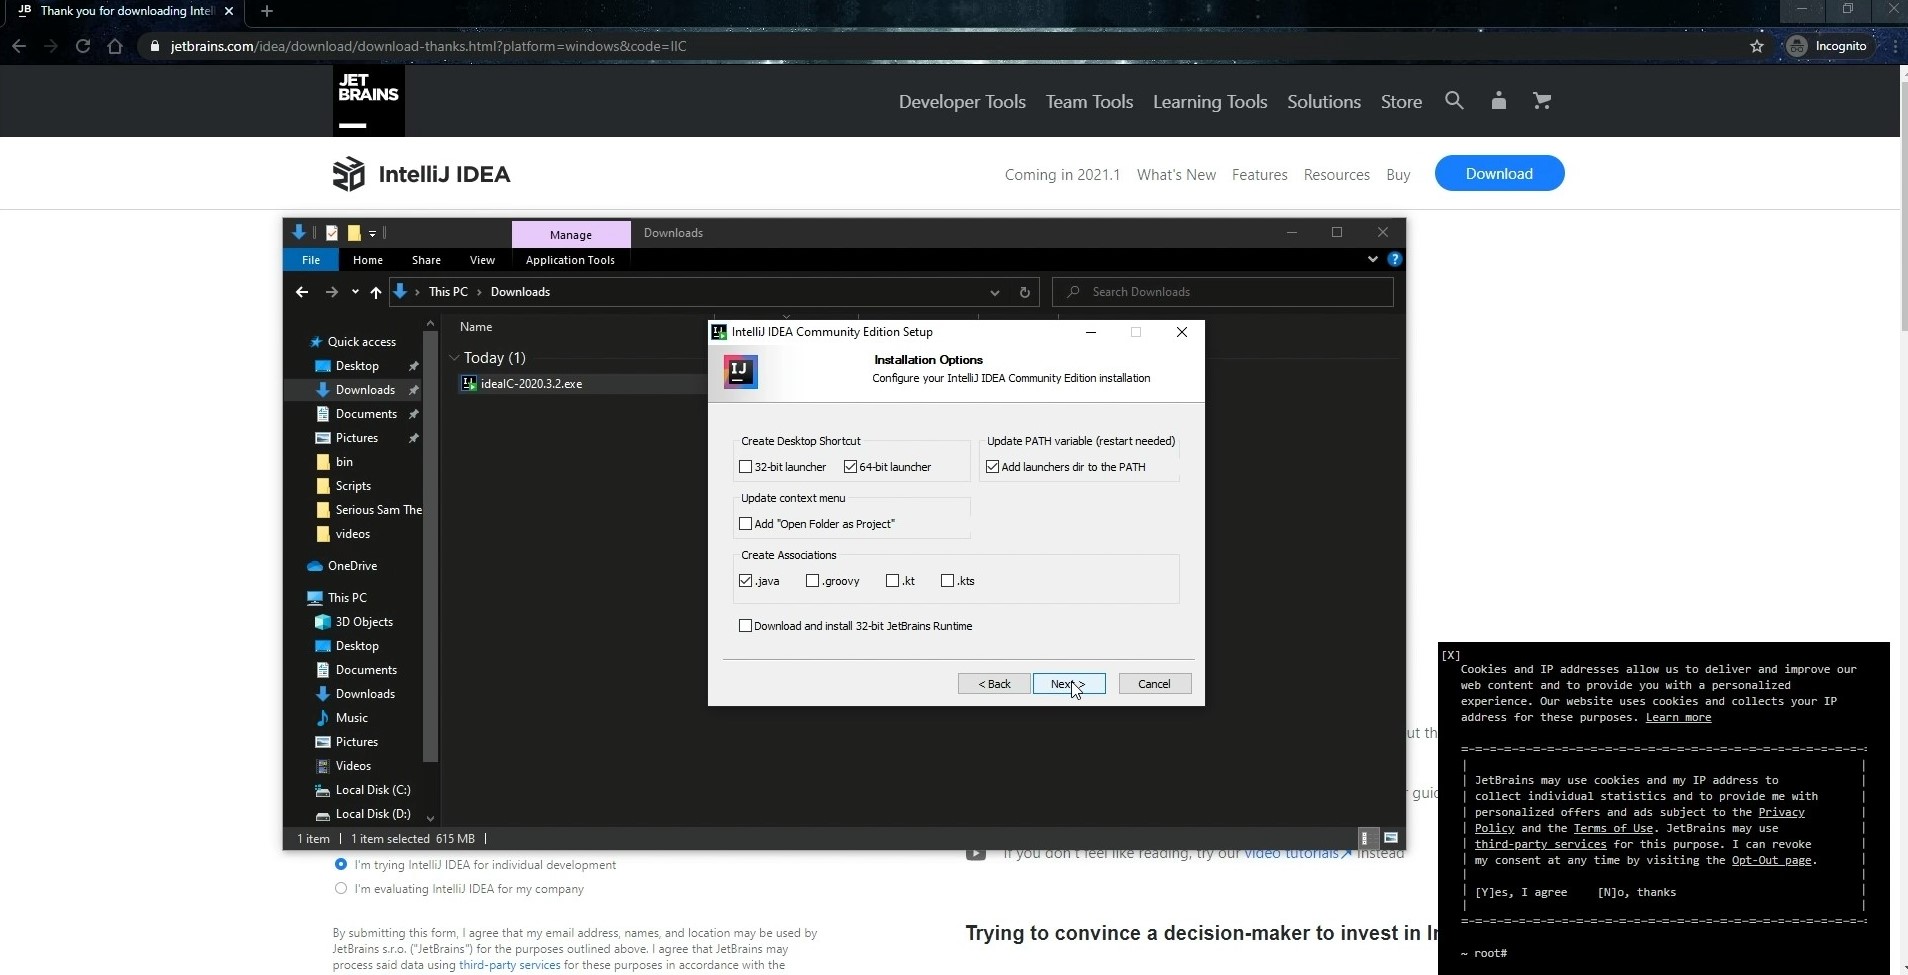
- At the Installation Options step, tick the checkboxes next to the 64-bit launcher (if you have a 64-bit version of Windows), Add launchers dir to the PATH, and .java. All these parameters are not mandatory, but they will make your life easier in the future.
- Complete the installation.
- We recommend restarting the computer immediately after reaching the final step of the installation, though we will select the option I want to manually reboot later.
- Start IntelliJ IDEA from the shortcut on the desktop or the Start menu.
- If you are installing IntelliJ IDEA for the first time, you will need to accept the license agreement.
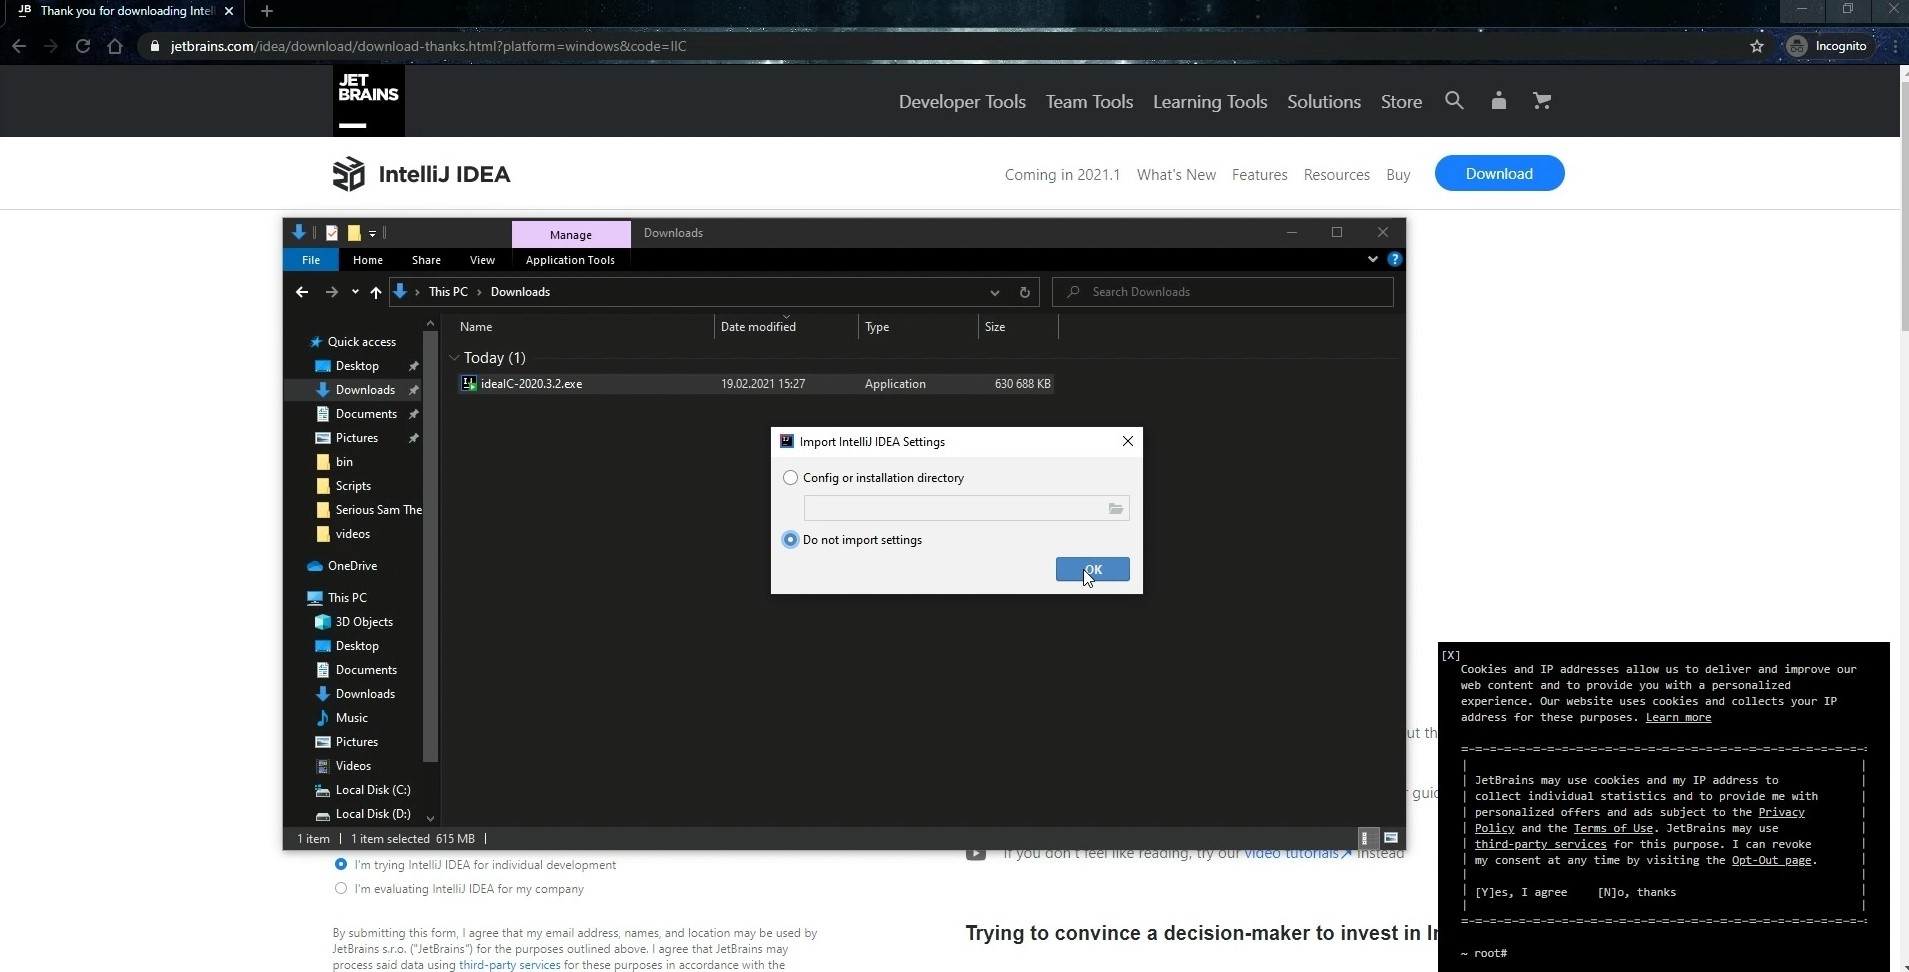
- If it is not the first installation, there will be a prompt to import the settings. In our case, we select Do not import settings and click on the OK.
- The next step is to create a Maven project.
- For this, click the New Project in the Welcome to IntelliJ IDEA window.
- Select Maven from the menu on the left. The latest installed version of Java will be automatically selected in the Project SDK dropdown.
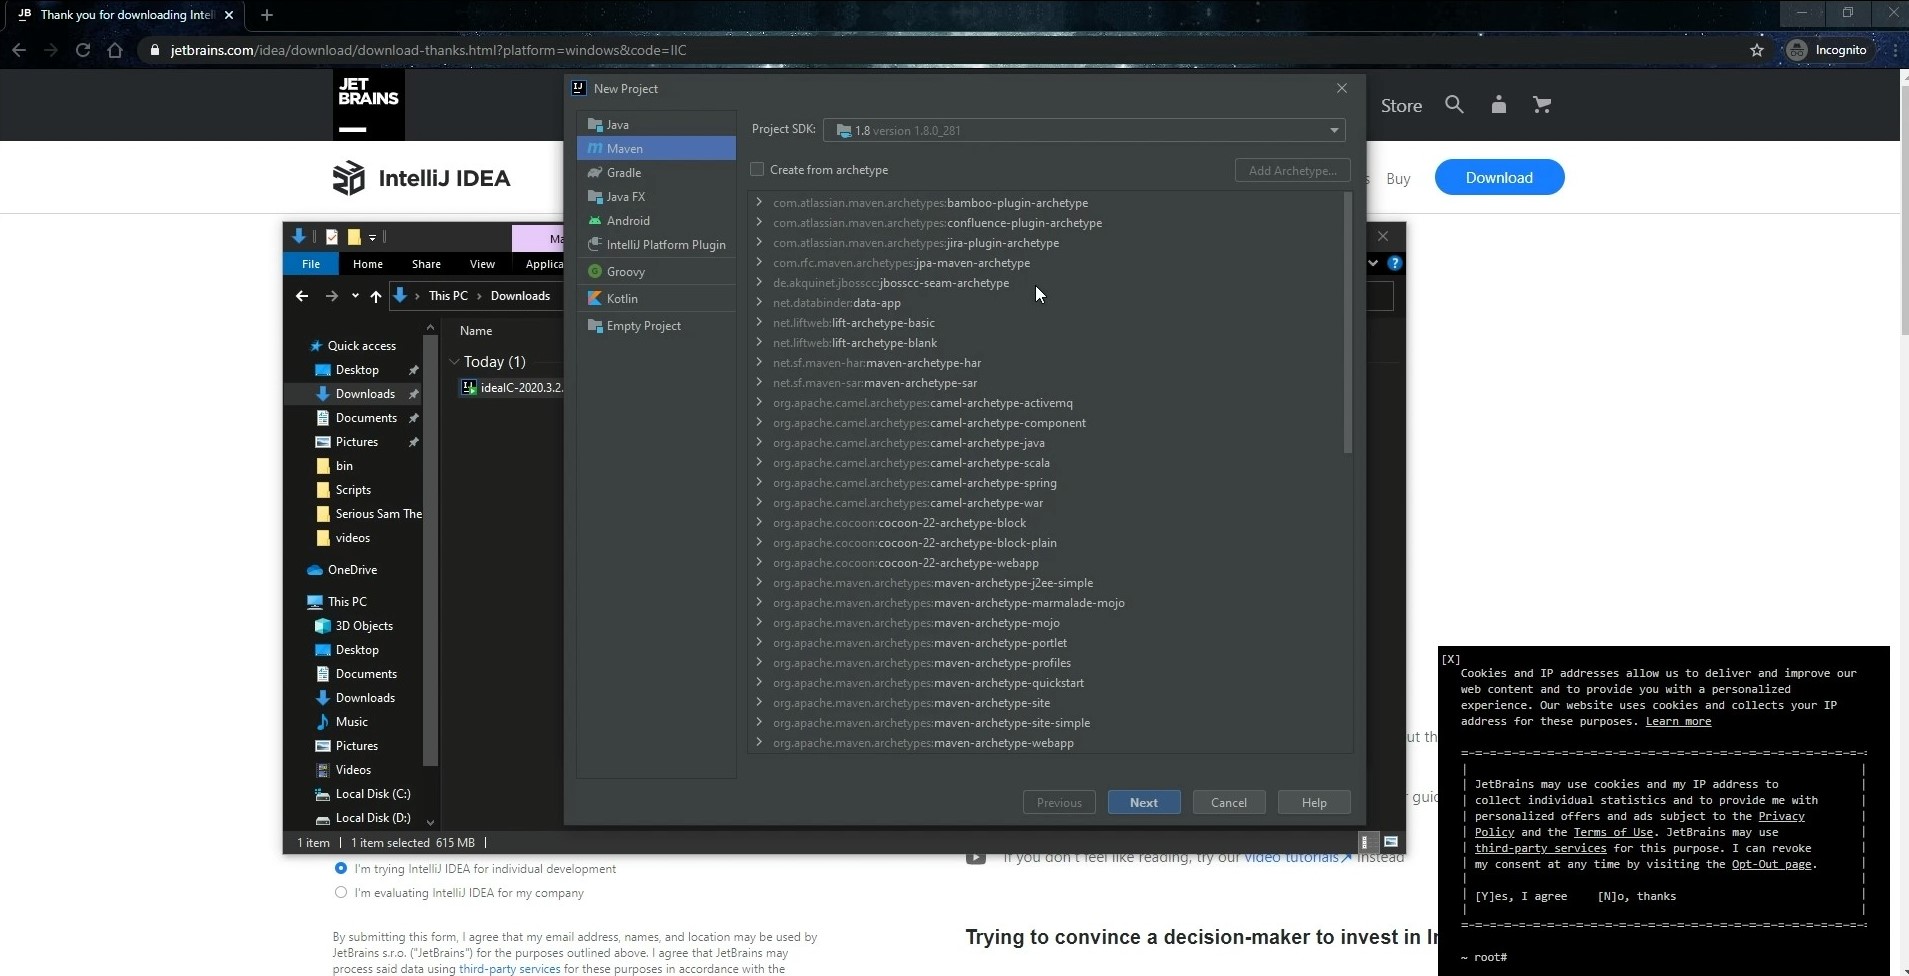
- Click on the Next.
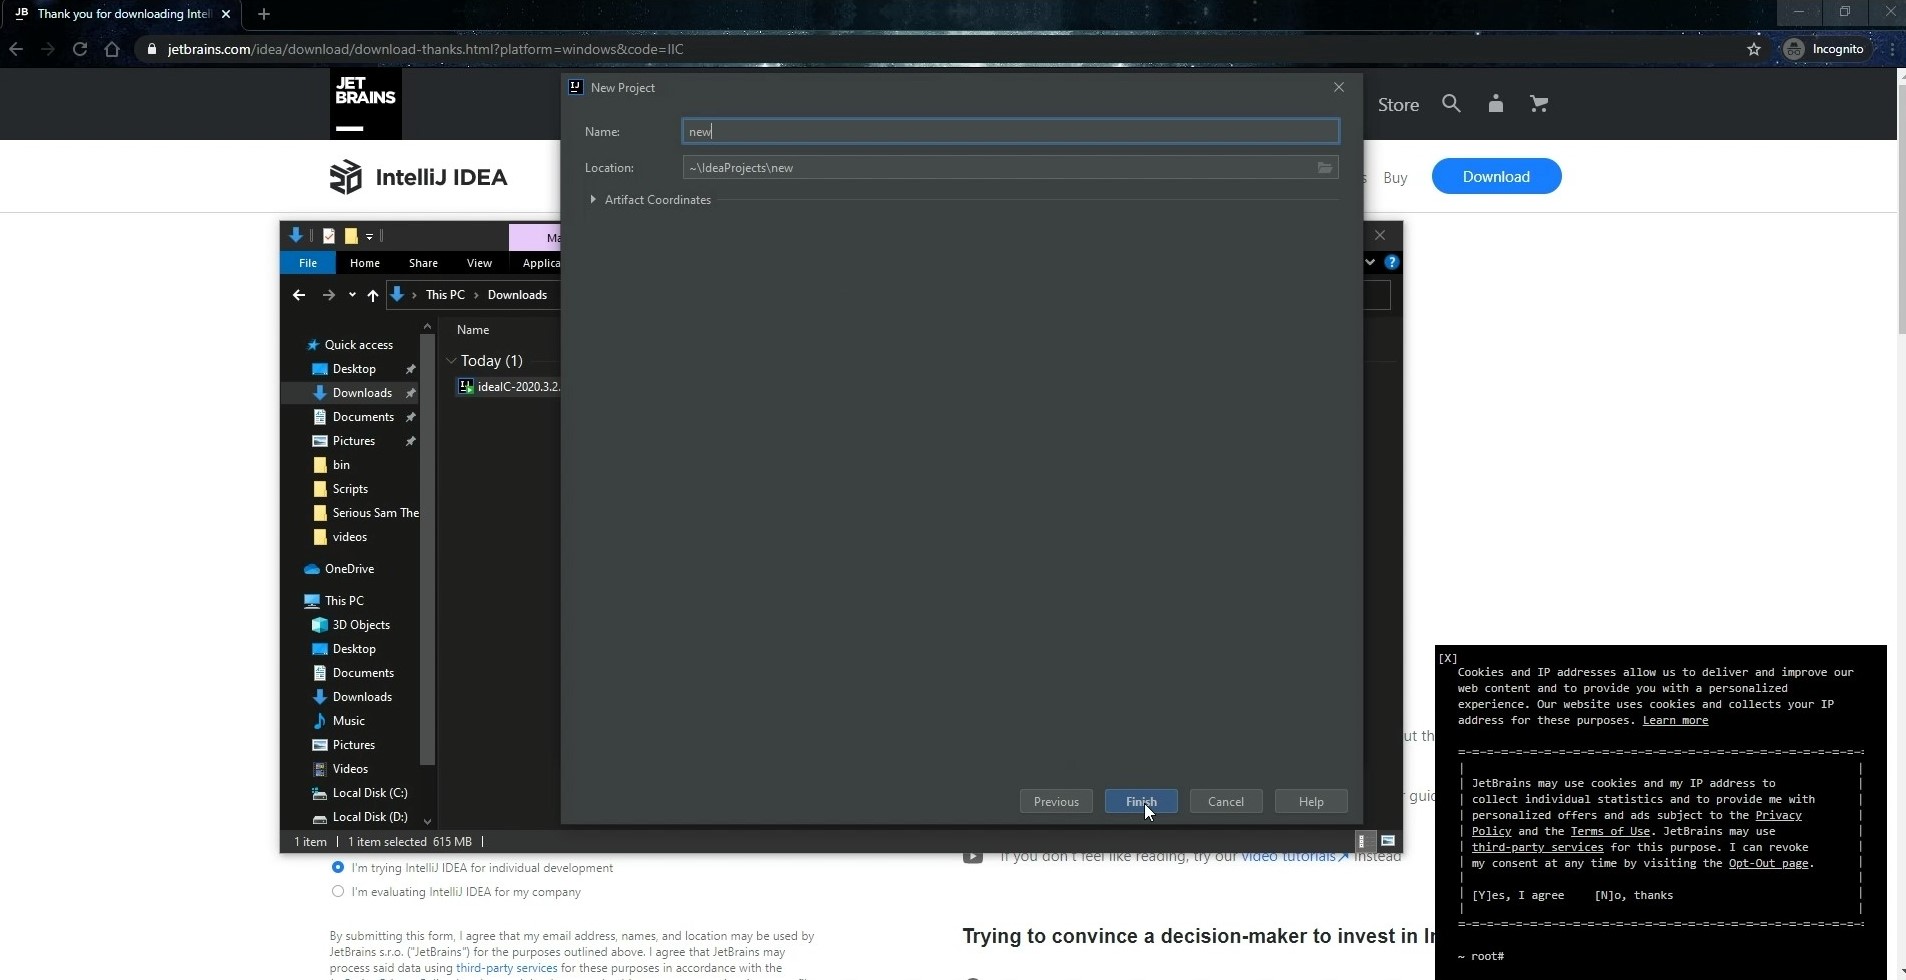
- Name your project and choose the location.
- Click on the Finish.
- Project creation and indexing will take some time. After this, IntelliJ IDEA will be ready for use.
- Now, let’s publish your project on GitHub.
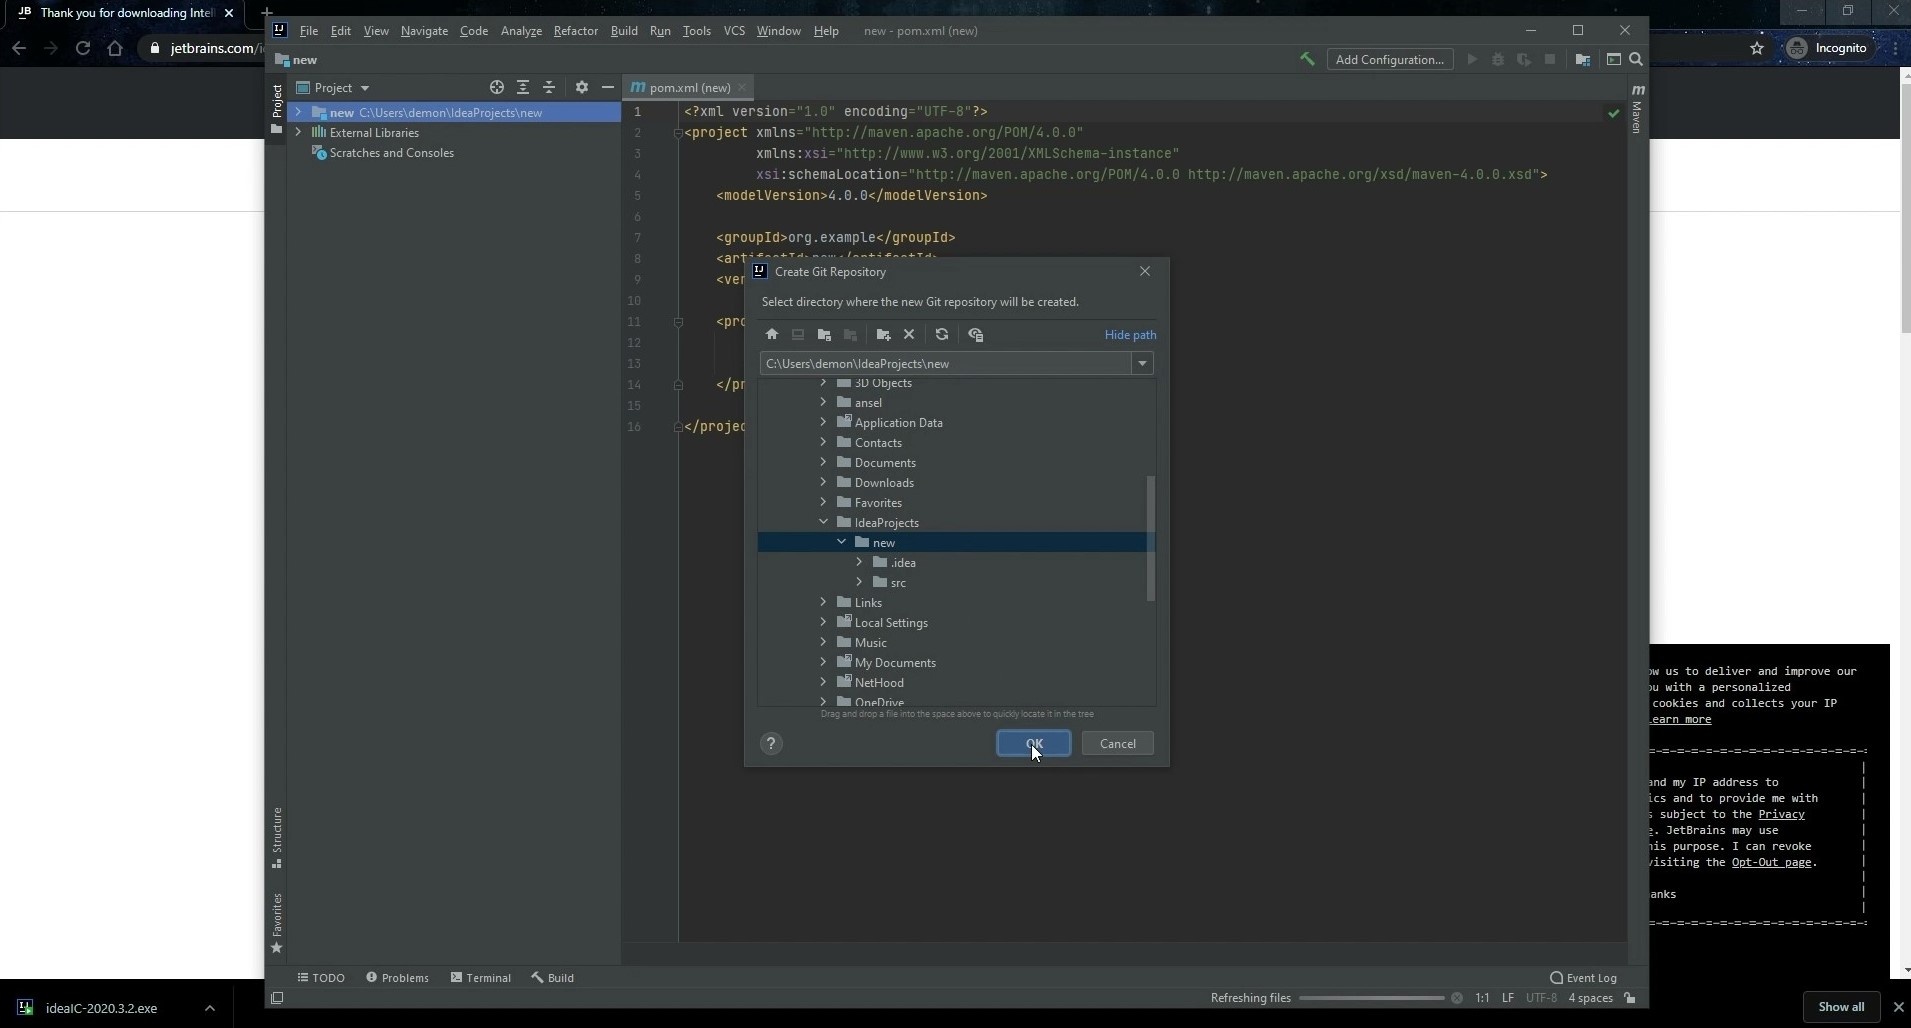
- In the IntelliJ IDEA window, click the VCS at the top of the menu and select Create Git Repository…
- In the new window, select the folder with your repository and click on the OK.
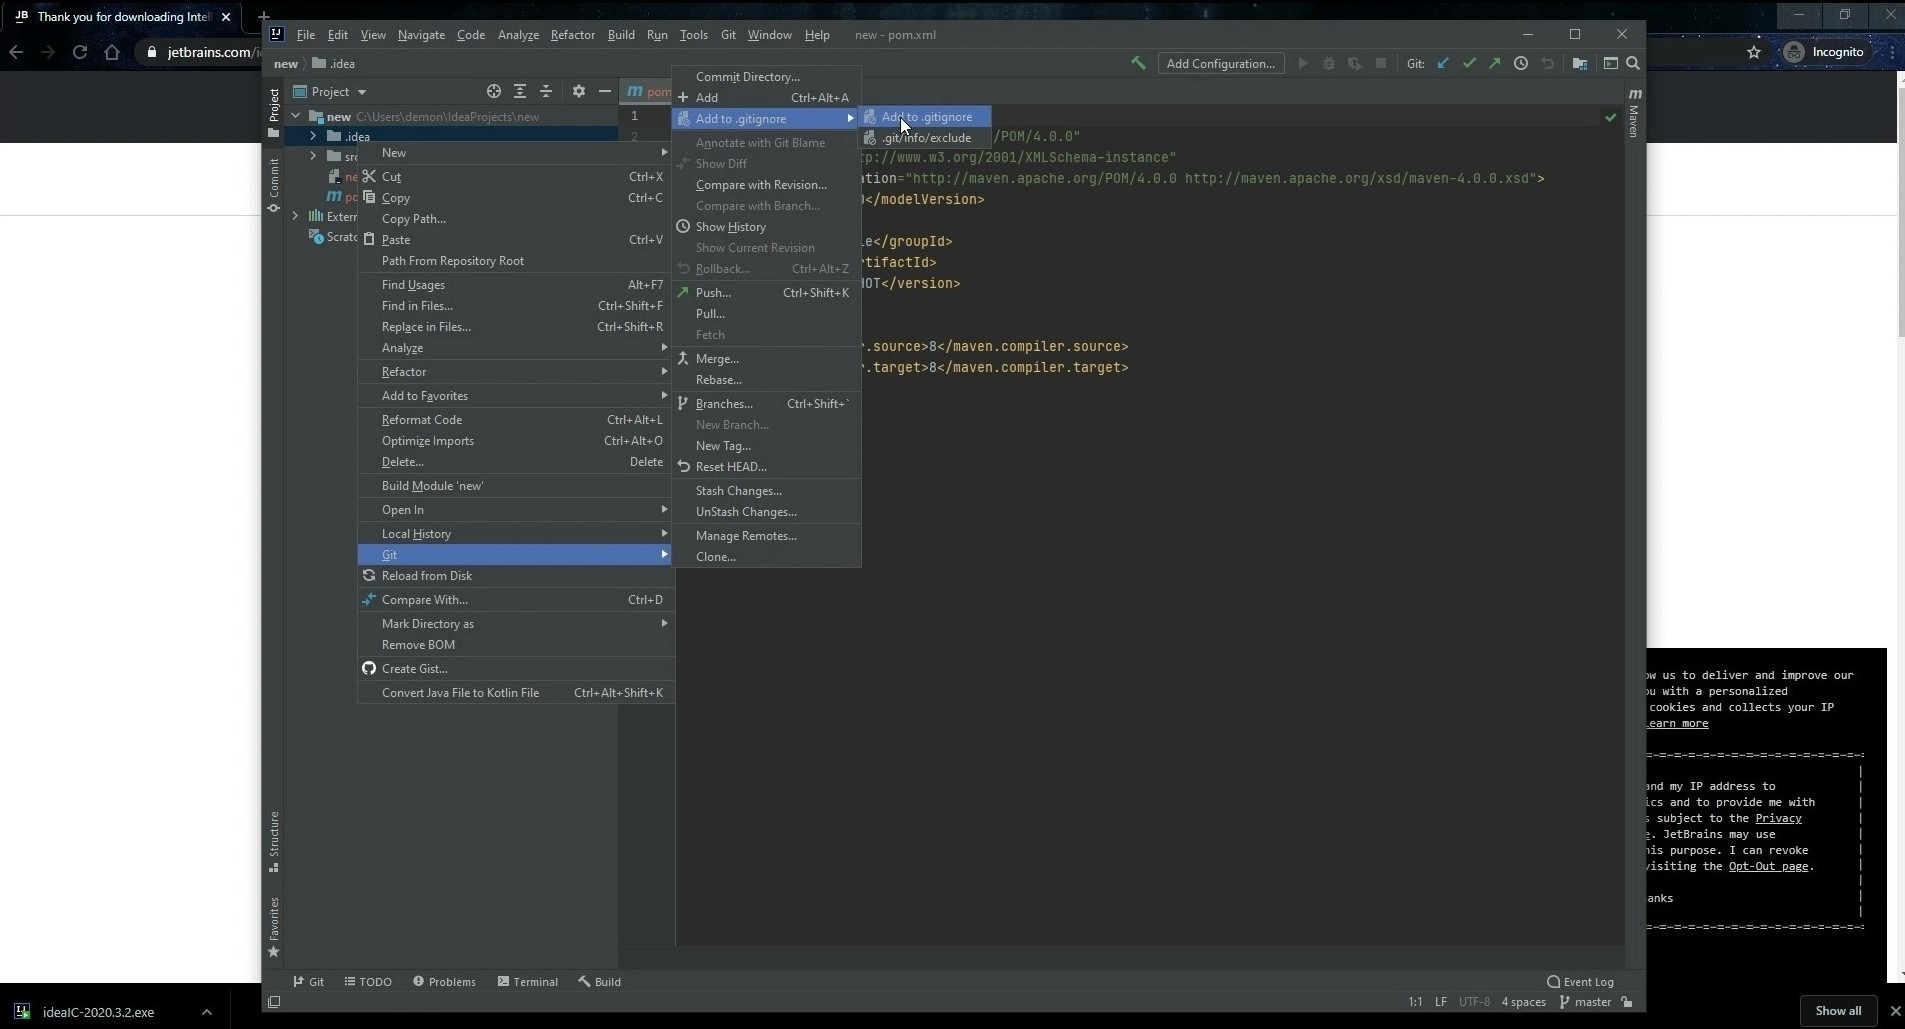
- If you open the root folder of your repository, you will notice the .idea folder. IntelliJ IDEA creates it for its own needs. Since this folder is not part of your project, there is no need to publish it.
- To remove this folder from the list of publications, right-click on it, then choose Git > Add to .gitignore > Add to .gitignore.
- Confirm that you want to add the file to Git.
- Click on the Add in the Add File to Git window.
- The repository is ready to be published.
- In the menu at the top, click on the Git > GitHub and select Share Project on GitHub.
- You will see a new popup window – Share Project on GitHub. Name the repository. Tick the Private checkbox if you want this repository to be available only to you and the people with the access granted, and add your GitHub account.
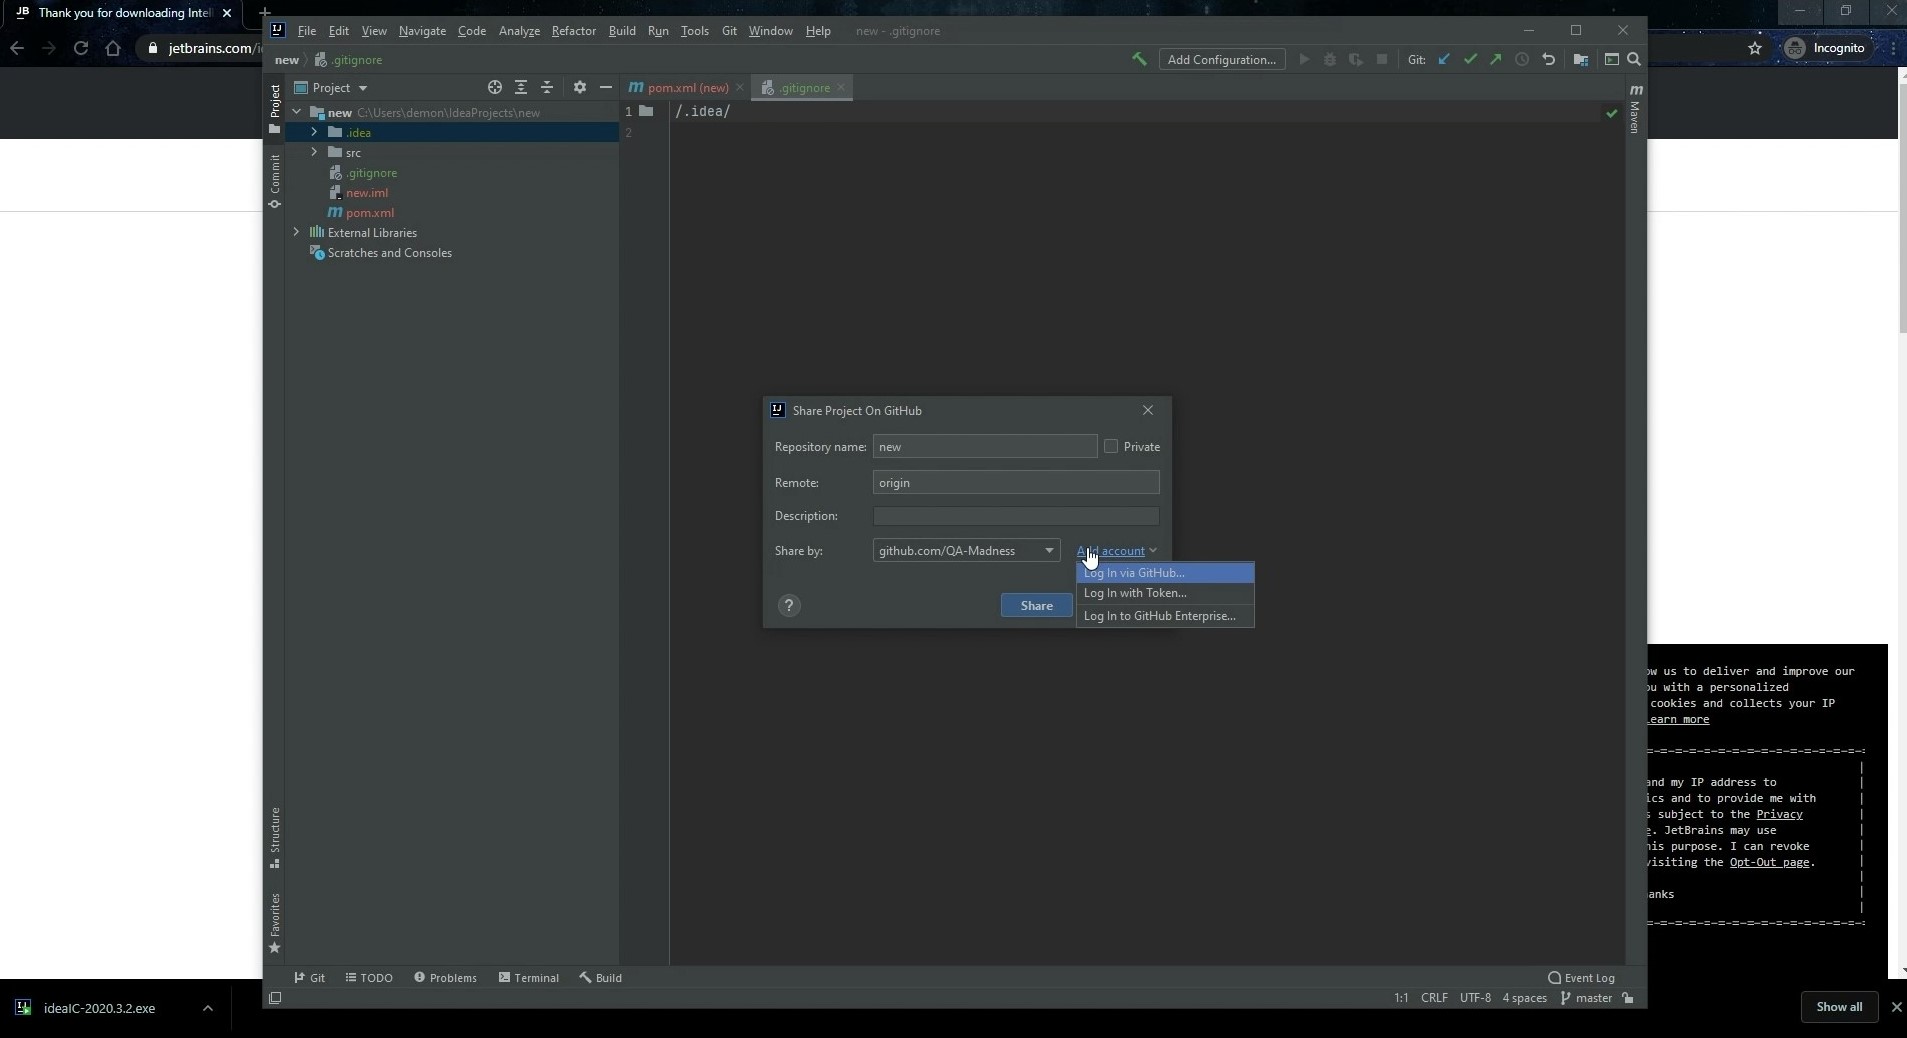
- Then, click on the Share.
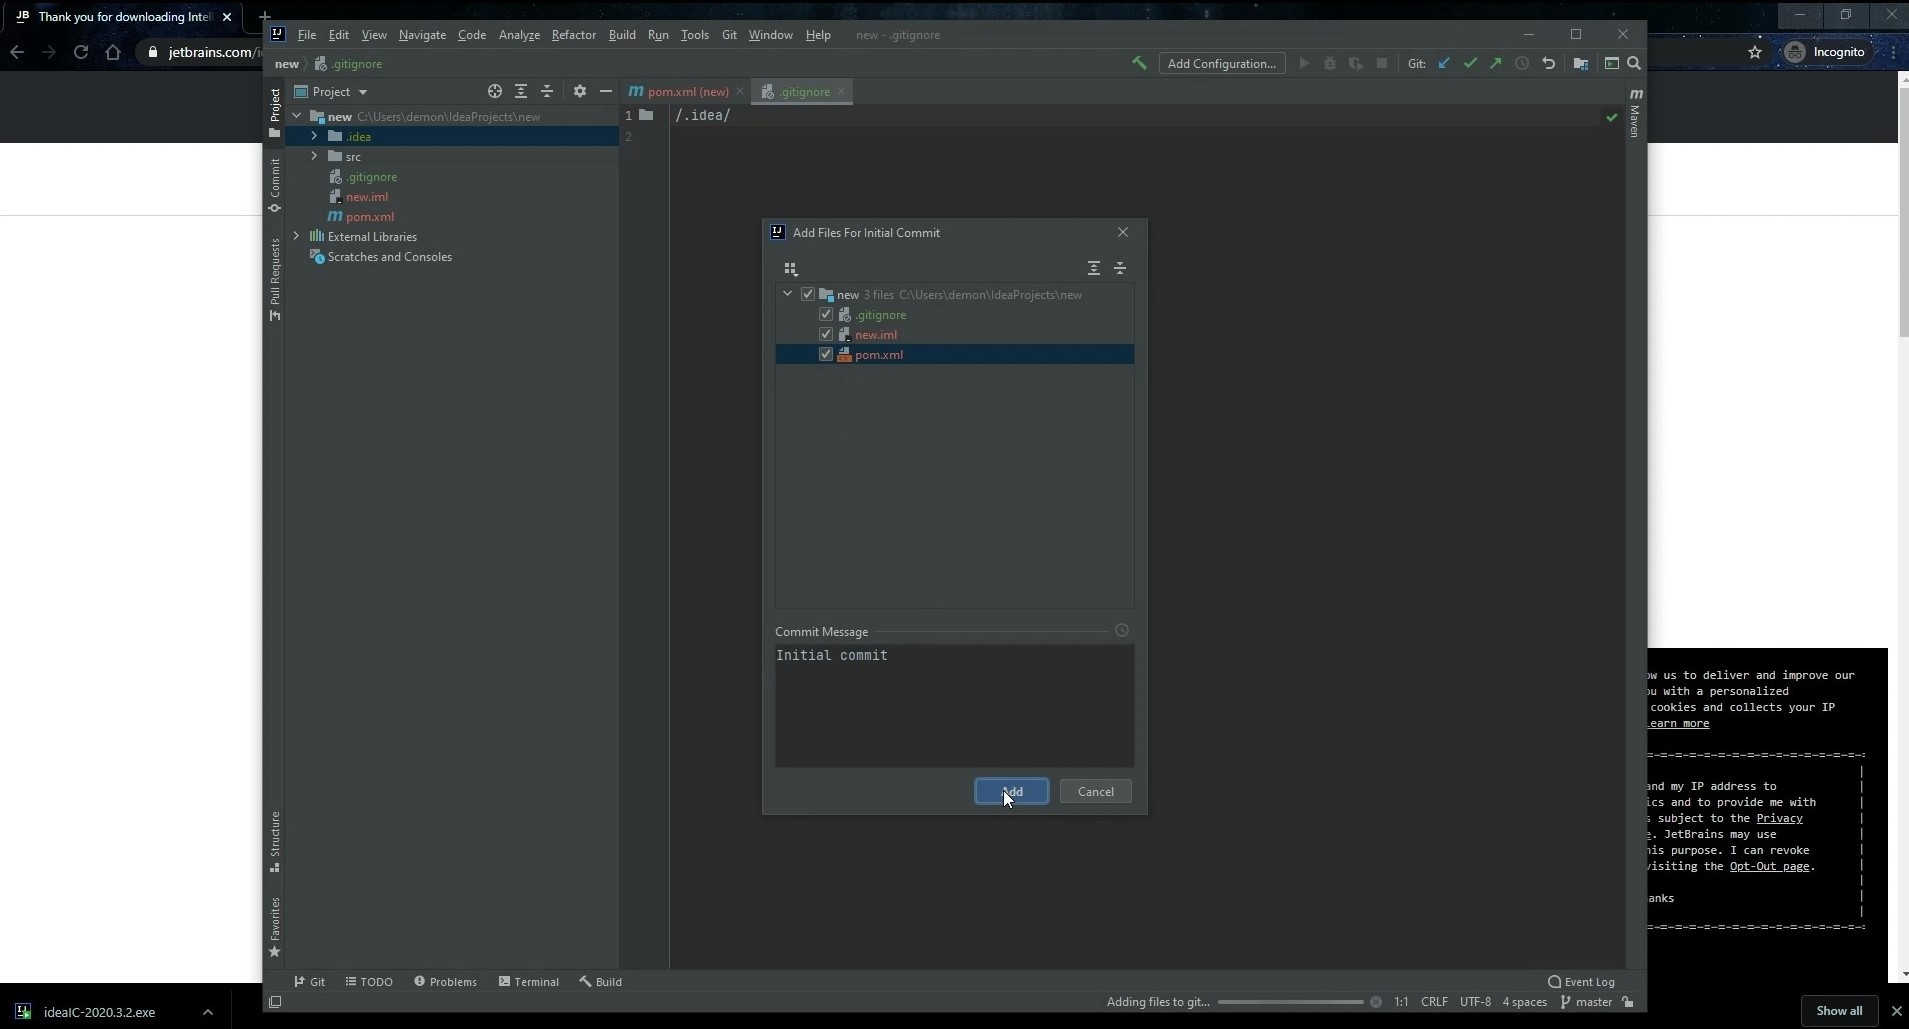
- Check all files in the Add Files for Initial Commit window.
- Click on the Add.
Wait for the publishing process to complete. Then, you can go to your GitHub account and make sure the repository has been successfully published.
